Squash Presentation for FPIES – 21 ways
Let me count the ways. Twenty-One. No, I am not talking about the line from Shakespeare. I am instead referring to the ways you can present a food, in this case, butternut squash, to a child with very limited food options. Yes, you read that right, 21 ways of squash presentation. So that means you will be getting this in two posts because I am not afflicting that novel of squashiness on you OR myself. We are going for the double novella instead.
I spoke with Ellie’s eating therapist as well as her Registered Dietician several times about the importance of diversity in the presentation of a food. From textures to temperatures, as well as shapes. This is especially important for those children who are limited to the number of foods that are ‘safe’ for them to eat. I see you FPIES families!
Presentation plans
I had grand plans of taking pictures and going into more detail on all the varied ways I presented butternut squash to Ellie over the past year. However, plans change. Ellie’s plans ALWAYS change. (Read about that in Ellie’s FPIES journey as well as the 1st update.) She no longer has any safe foods including butternut squash, which had been her main safe food over the past year. We are hopeful for her food trial of blueberries! As soon as we confirm they are a safe food (we are almost there!), we will be going bonkers with blueberry presentations too.
I just can’t make all the foods that used to be ‘hers’ and not let her have them now, so sorry, no pictures at this time. However, I still wanted to at least provide you some ideas that you may not have considered for food presentation options. I will briefly outline the steps I used for each variation. These different ways of cooking or preparing the squash can also easily be adapted to other foods if your child has a different safe food. I did similar methods for turnip and apple when we trialed them as well.

FPIES food Questions?
If you have questions about how I made certain presentations, please feel free to contact me. I am happy to help you to the best of my knowledge. We are a community after all! Also, if you have creative ways you have presented different foods, please feel free to share, I will welcome all the knowledge I can get!
Many of these ways of offering squash seem repetitive as I used the same cooking methods for the different cuts or shapes of the squash. We went for any kind of variety as she had just one or two foods at the time.
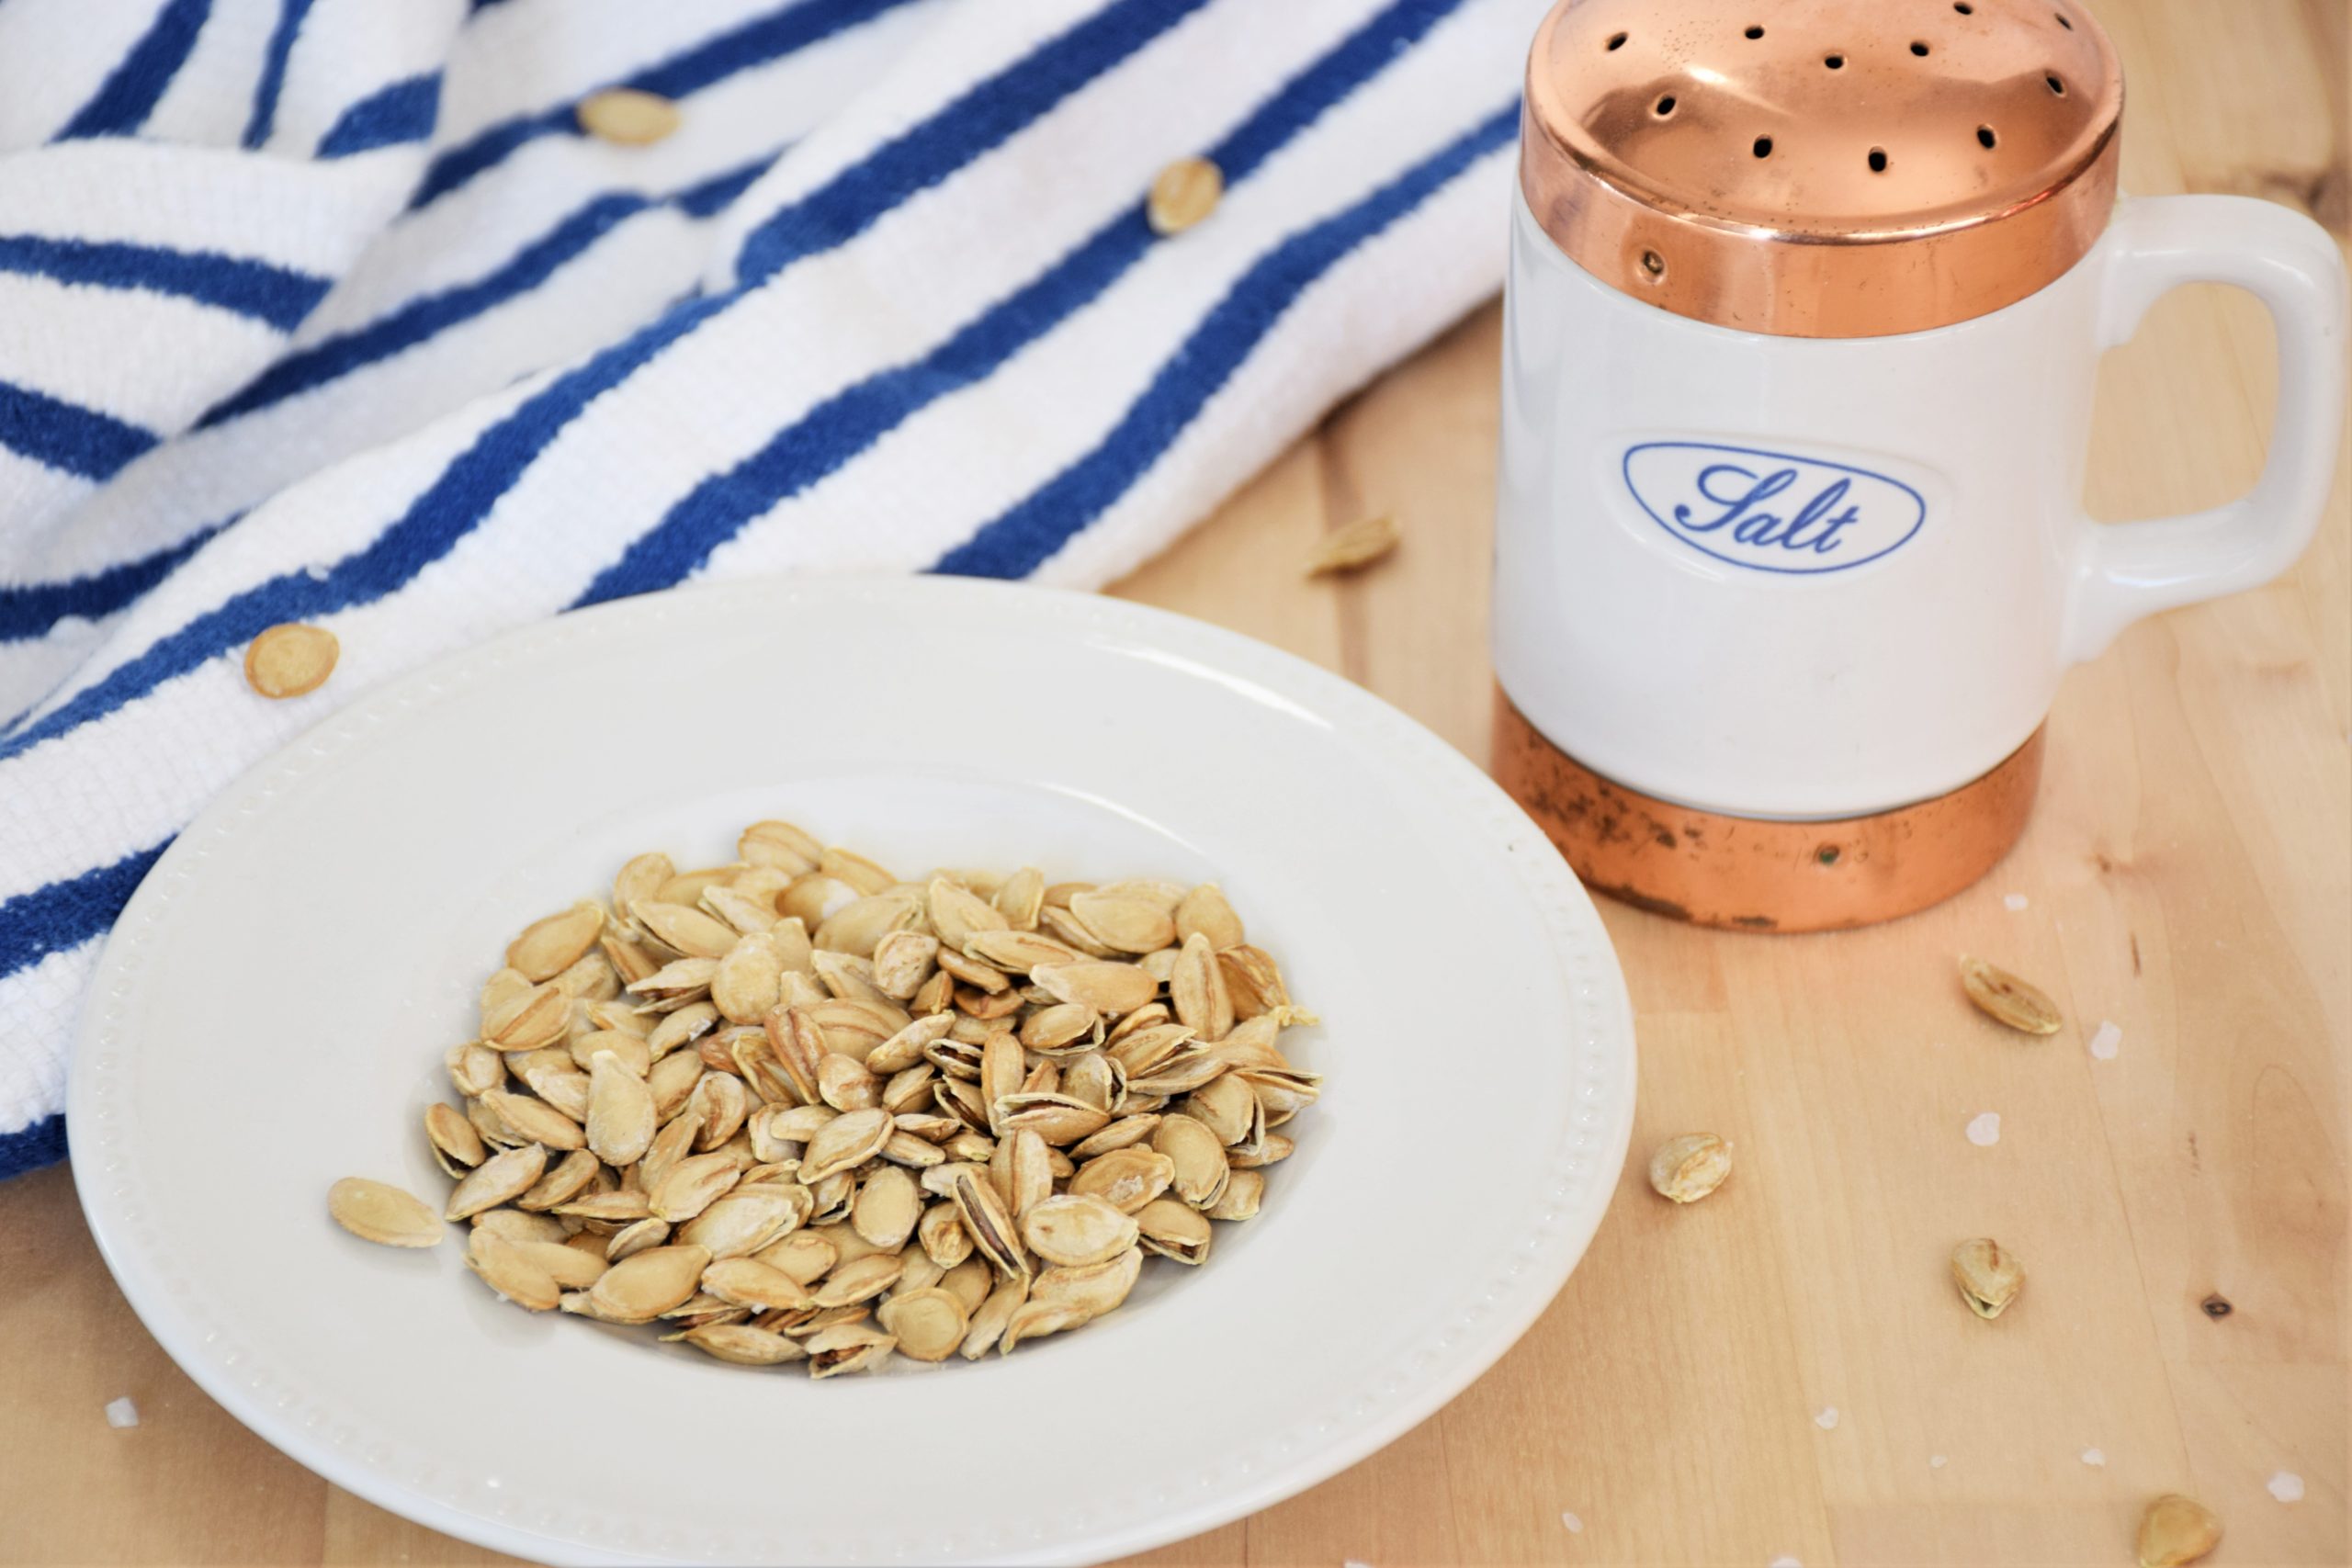
I also was able to use sea salt at the time with Ellie. I will provide the overview directions with sea salt being used as most are able to tolerate sea salt. If you are not able to use sea salt, feel free to follow the same instructions just omit the salt.
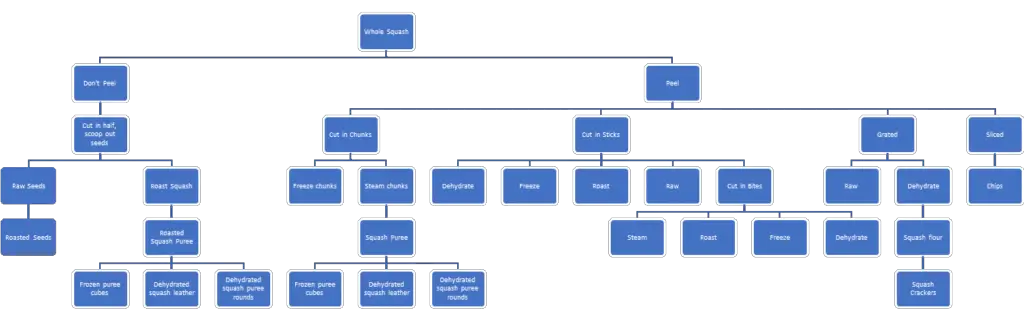
I have high hopes that soon we will be going through more foods and finding variations on ways to present the food to Ellie. I look forward to sharing that with you! Until then, here are the twenty-one ways we presented squash to Ellie. I created some flow charts to hopefully simplify and summarize this information. (Visual people this is for you!) There are brief instructions for each presentation following the charts as well.
Disclaimer: Please read these suggestions as just that, suggestions. Ellie was/is dealing with oral aversion, so we focused on introducing her to having any food – and the flavor of food – in her mouth. She spit almost everything out and didn’t try to swallow anything, so there was no risk of choking. Discuss any concerns with your healthcare provider.
Squash Seeds and Roasted Squash
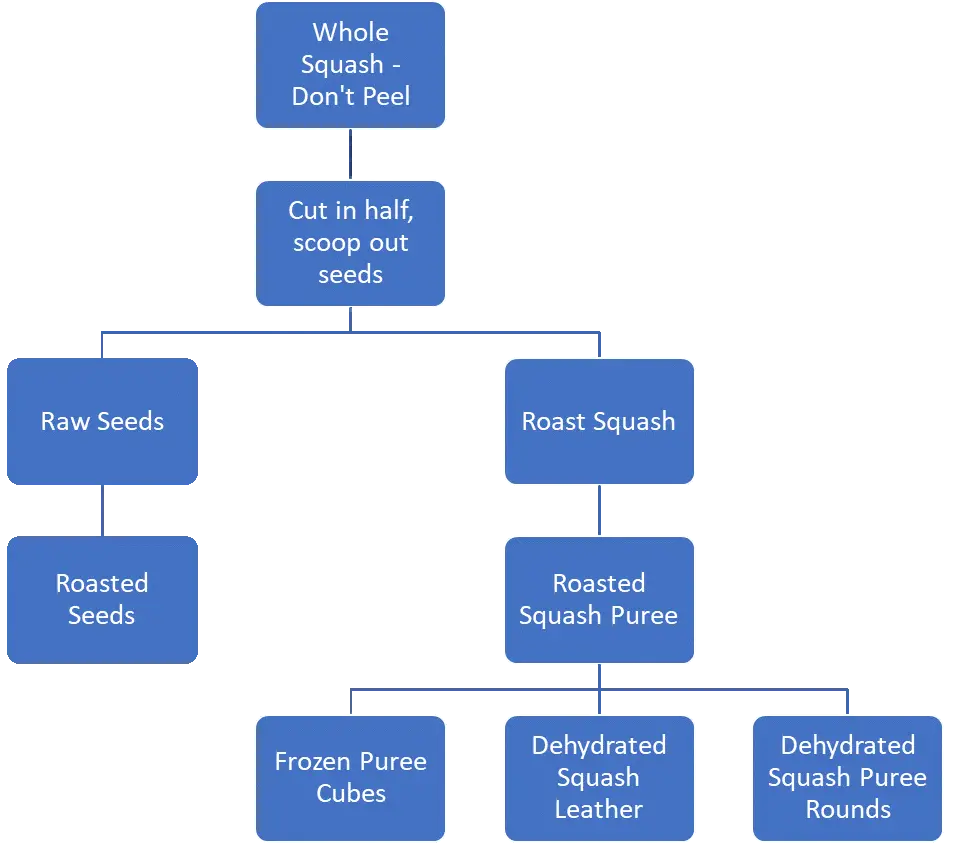
Raw seeds
This was one of my favorites, because it not only worked on encouraging oral exploration of food, but it was also a sensory activity for Ellie. I wouldn’t recommend this for young kids though as the seeds could potentially be a choking hazard. Once you know you can trust your child with seeds this is a wonderful option to have your child ‘help’ with. (I suggest starting this around age 2, Ellie was about 20 months when we started this and she did very well, but discuss with your child’s healthcare provider if you have concerns.) I would cut the squash in half. Ellie would then ‘help’ me pick out all the seeds from the squash and put them in a bowl. Many of the seeds went into her mouth during the process. It provided the squash flavor to her as she sucked on the seeds, as well as encouraging the sensory exploration of finding the seeds amidst the stringy, squooshy innards.
Roasted Seeds
Preheat your oven to 200 degrees Fahrenheit. Take the squash seeds you cleaned out of the squash in ‘raw seeds’. Put seeds in a saucepan of heavily sea salted water on the stove. Cook on medium high heat until water starts to simmer. Simmer seeds in salt water for 15 mins. Drain seeds in a colander. Place drained squash seeds on a paper towel or flour sack towel and pat to dry. Line a baking sheet with a silicone baking mat. Pour the seeds onto the baking mat and sprinkle with more sea salt and toss to make sure all seeds have some salt. Spread seeds out into a single layer and place baking sheet in preheated oven. Cook seeds until seeds are crunchy -about an hour- stirring every 10-15 mins.
If you would like to give your seeds a bit of a toasted flavor, increase the temp to 350 and let roast another 10-15 mins, stirring every 5 mins and checking. Seeds are done when they are just turning lightly brown. Cool and store in an air-tight container. These were definitely a favorite in our house and always requested by Ellie (and the rest of us too). It was sooo nice to be able to finally give Ellie a snack cup like sister that had something other than crushed ice in it!
Truthfully, I am still going to make them once Ellie has other food options that she likes as much, so it won’t be heartbreaking for her to see them but not get to eat them. Rosie is looking forward to that day as well as my husband.

Roasted squash halves
This is one of those self-explanatory ones, but for the sake of being thorough, I will include it. (Actually, I will admit here that I wasn’t sure how to go about roasting a squash with only being able to use salt but no oil or spray or anything. It worked great though!) Preheat your oven to 375 degrees Fahrenheit. Halve your butternut squash and clean out the goop and awesome seeds (save those!). Line a baking sheet with a silicone baking mat. Sprinkle the inside of the squash with sea salt. Turn the squash upside down (cut side down) on the silicone mat. Baking in the oven 45 min to an hour, or until you can easily pierce through the squash with a knife or a fork. Remove from oven and allow to cool slightly before turning over. Scoop out squash and allow to cool before serving to your child.
Roasted squash puree
Scoop out the cooled, roasted squash (see above) from the skin into your food processor or blender if you don’t have a food processor. Blend until the puree has reached your desired consistency. (If you are going to use this for dehydrating, blend until smooth.) Store either in a closed container in the fridge or freeze in baby food trays or ice cube trays to take out as needed.
Frozen roasted squash puree
For this, you can use either the roasted squash puree (see above) or the steamed squash puree (see below). This is a great option for storing your puree, that way you always have some ready to go. Use either a baby food freezer storage container (either a silicone base like the link above, or I use one like this that I really like) or even an ice cube tray. Fill each compartment not quite to the top with puree (frozen puree expands a little) and freeze overnight or longer. Either keep the frozen cubes of puree in the container or remove them and put them in a freezer bag if you need to use the container for something else. Take cubes out and put in a mesh or silicone feeder for child to chew on, or carefully cut some off so they have frozen squash puree pieces. You can also (of course) thaw the puree to have it at room temp or slightly warm.

Dehydrated Roasted Squash leather
Take the squash puree (either roasted or steamed) and mix in sea salt to taste. Spread puree evenly on the ‘fruit leather tray’ inserts (like these) for your food dehydrator or on a silicone baking mat lined baking sheet for your oven. With the back of a spoon or your clean finger, smooth the puree out until even and thin but not see-through. Dehydrate squash leather a few hours at 135 degrees Fahrenheit in your food processor, or the lowest temp your oven can go 200 degrees F or under. Dry until it can be fairly easily lifted up, and then flip leather over and continue drying until no longer tacky.
While still warm, cut leather into sections and lay on a square of wax paper, and roll-up. When cooled, place rolls in a ziplock or airtight container. (FYI this ‘leather’ will not be like typical fruit leather as it doesn’t have the sugar content to make it as pliable and chewy. This is still good to use as bigger pieces and older babies and toddlers can suck on it or gum it. You can also cut this up into tiny pieces and put it on your child’s tray to practice fine motor skills.
Dehydrated Roasted Squash puree rounds
Take puree (see puree instructions for roasted puree or steamed puree) and mix in sea salt to taste. Dollop puree on ‘fruit leather tray’ inserts for your food dehydrator or on a silicone baking mat/lined baking sheet for your oven. With the back of a spoon or your clean finger, smooth the rounds out a little until they are evenly thin, but not see-through. Optional: Sprinkle additional sea salt on top of the puree rounds. Dehydrate puree rounds at 135 degrees Fahrenheit until they are no longer tacky. Cool and store in a closed container.
Squash Chunks and Puree
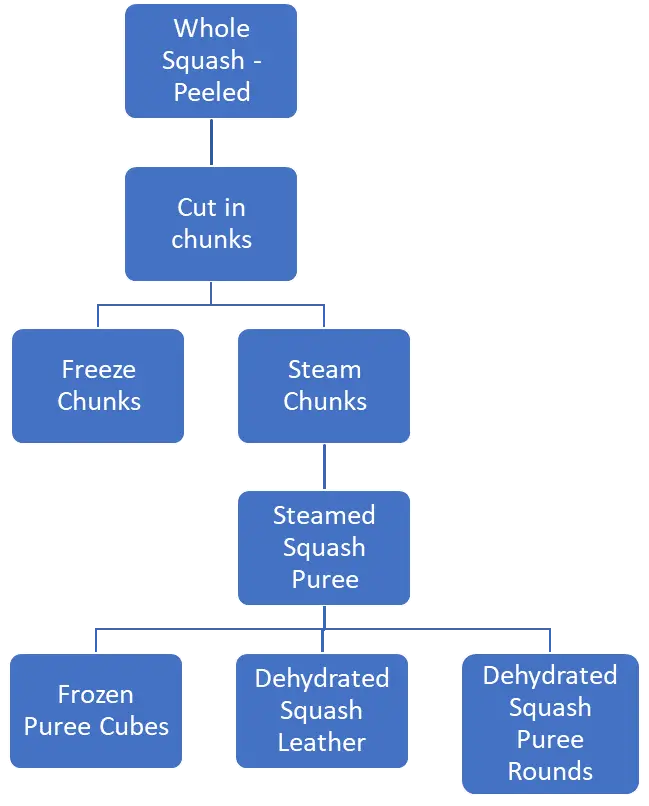
Frozen chunks
Okay, this one is going to take a LOT of explaining. Just kidding. Take chunks of butternut squash, about 1”, and freeze on a saran wrap lined baking sheet, not touching. After frozen, remove from the baking sheet and put in a freezer Ziploc bag to return to the freezer.
Steamed squash chunks
Peel, halve and clean out butternut squash. Chop butternut squash into about 1” cubes. Steam squash with a steamer if you have one. If not, you can boil the squash too, but the texture will be slightly different, and you lose a bit of the squash’s awesome nutrients boiling. Steam covered or boil until squash is easily pierced with a fork or knife. Voila! Steamed squash. If you have a little one, feel free to cut the squash up into much smaller pieces before offering it.
Steamed squash puree
Place the steamed squash (see above) into your food processor or blender if you don’t have a food processor. (This the food processor I use and LOVE.) Blend until the puree has reached your desired consistency. (If you are going to use this for dehydrating, blend until smooth.) Salt to taste. Store either in a closed container in the fridge or freeze in baby food trays or ice cube trays to take out as needed.
Frozen Steamed Squash Puree
See above ‘Frozen roasted squash puree’
Dehydrated Steamed Squash Leather
See above ‘Dehydrated Roasted Squash leather’.
Dehydrated Squash Puree Rounds
See above ‘Dehydrated Roasted Squash puree rounds’.
Alright folks, that’s all for now. Are you still with me? Are your eyes crossed and your hand squashed against your face? (Sorry to all the pun-haters.) I will post the second half of this novella soon, so stay tuned for the next 12 squash presentations! I know you are all on the edge of your seats, sorry to leave you on such a cliff-hanger.
For those of you who want to see the crazy big chart for all 21 ways not broken down, here it is. Just don’t expect to be able to read it since it is super tiny, you can just take my word for it! If you would like to have a copy of this, please email me and I will send it to you!