Squash Presentation, FPIES foods – 21 ways – Part 2
Welcome back to the fun and exhilarating world of food presentations for limited food options. I know you are all on the edge of your seat waiting to read the rest of the 21 ways to present squash. These presentations can also be used on different foods if squash isn’t one of your food options (just like it isn’t an option for Ellie anymore). I will post an Ellie update soon with her blueberry trial results, as well as some of the texture variations we used with blueberries. Please, always feel free to reach out through email or comments on this post if you have any questions. I may not always have the answers, but I am happy to help when I can!
Disclaimer: Please read these suggestions as just that, suggestions. Ellie was/is dealing with oral aversion, so we focused on introducing her to having any food – and the flavor of food – in her mouth. She spit almost everything out and didn’t try to swallow anything, so there was no risk of choking. Discuss any concerns with your healthcare provider.
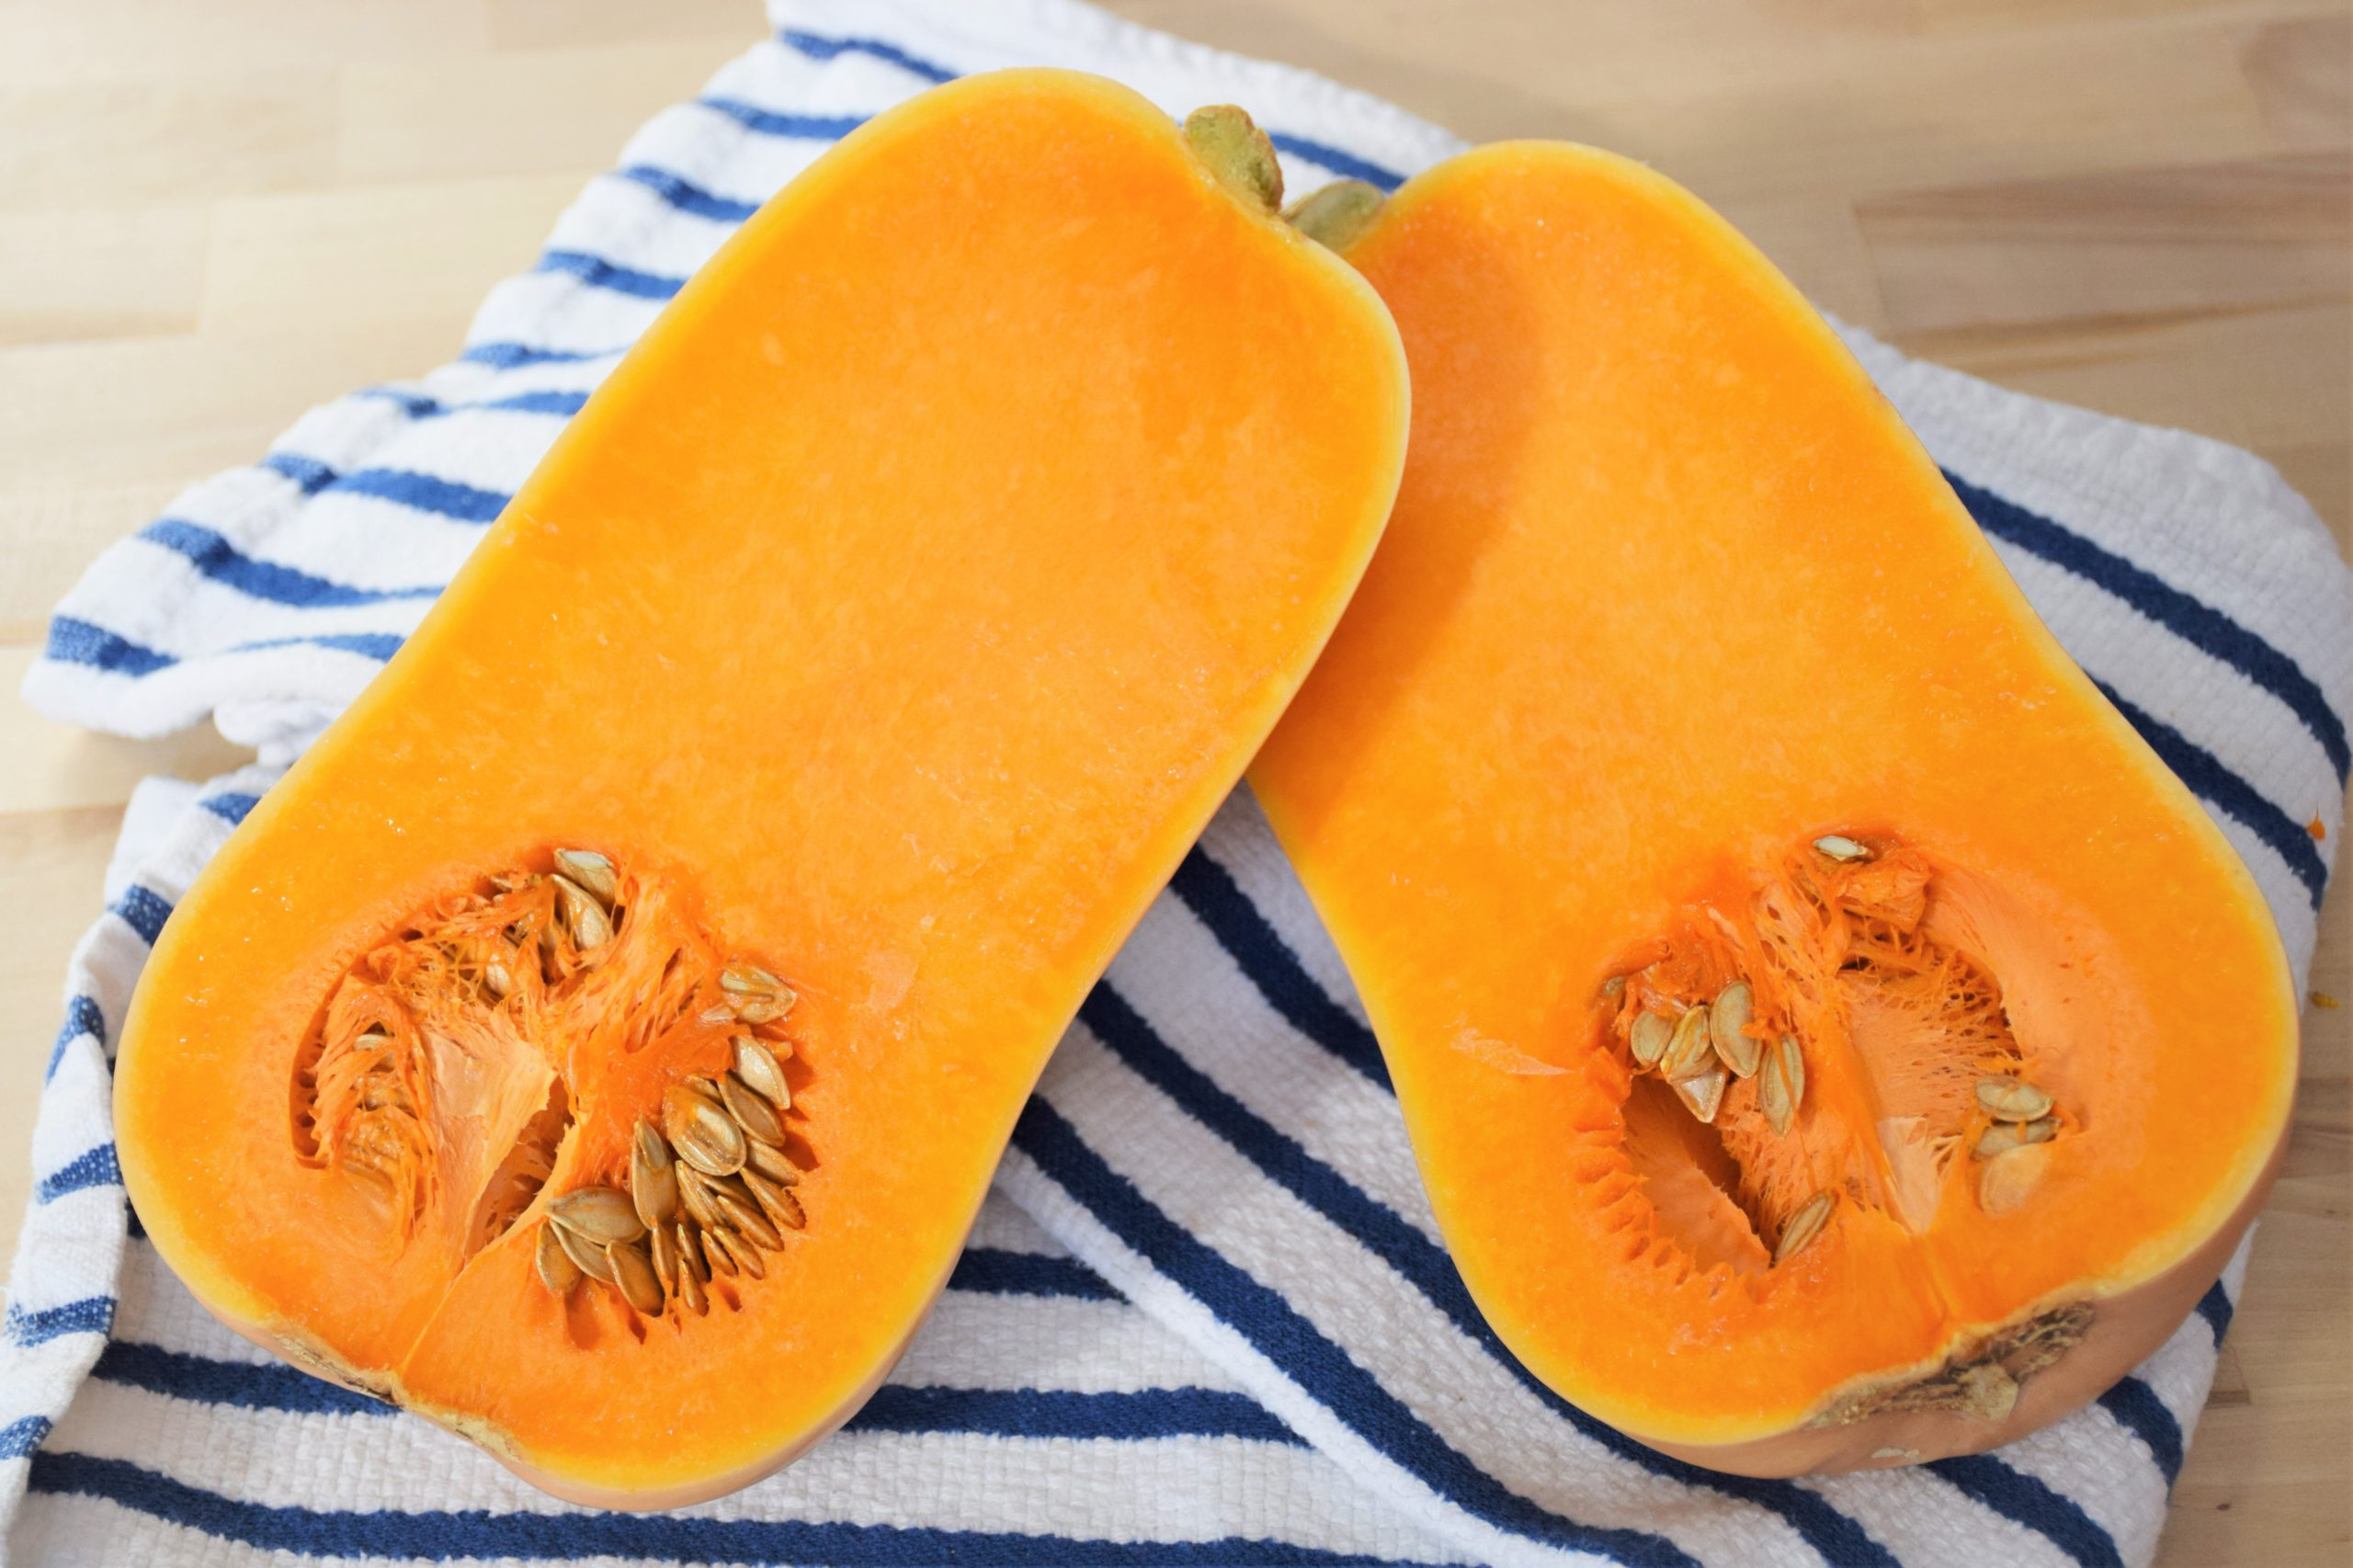
Squash Sticks and Bites
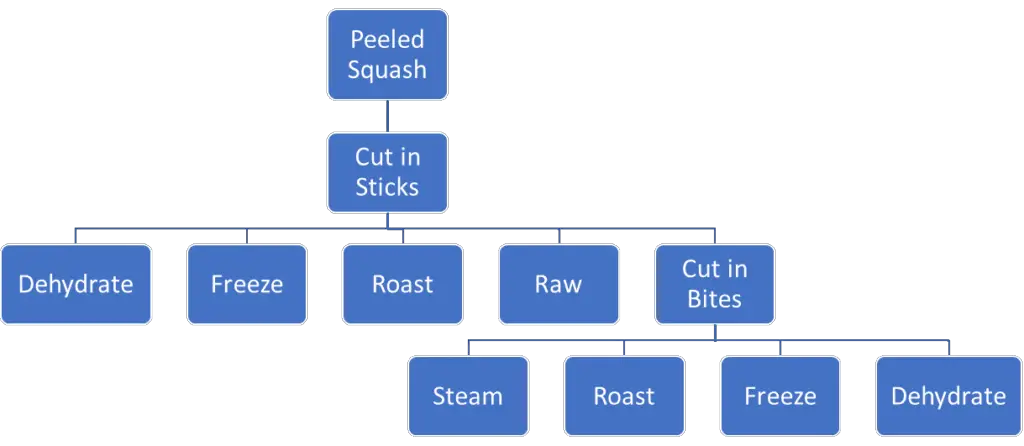
Raw sticks
In case you have questions… Peel the squash and cut up the butternut squash into sticks. I did about ¼” to ½” in width and about 3” – 4” in length. This was great because it was a quick way to provide a snack. It also encouraged Ellie to interact with the squash as she could easily hold it herself and gum it and chew it. This was a readily accepted form for Ellie because it was also not messy. Ellie also really enjoyed ‘dipping’ her squash sticks into sea salt water or just some sea salt sprinkled on her tray or plate. She would then suck the salt off the stick.
Dehydrated squash sticks
Take the sticks described in ‘raw sticks above’ and place in a food dehydrator in a single layer, not touching. I found it was easiest to use the ‘fruit leather tray’ insert since I wasn’t able to use nonstick spray or oil to keep the squash from sticking to the normal trays. Sprinkle sticks with sea salt. Dehydrate at 135 degrees Fahrenheit until sticks no longer have any ‘dampness’ to them, about 10-12 hours. Cool and store.
You can also dehydrate sticks in the oven. Use a silicone mat lined baking sheet and set oven temp to the lowest it will go. Sticks are done when there is no longer any noticeable dampness.
Frozen sticks
Take the sticks that are cut as described above and freeze on a baking sheet not touching. After frozen, remove from the baking sheet and put in a freezer Ziplock bag to return to the freezer. These are FANTASTIC for teething.
Roasted sticks
Preheat oven to 350. Line a baking sheet with a silicone mat. Place squash sticks (see ‘raw sticks’ above or ‘frozen sticks’ above) on the mat. Sprinkle with sea salt and mix around until all sticks have some salt. Arrange sticks in a single layer and bake. Let sticks bake for 20 minutes and flip them over. Continue baking on the other side, about 15-20 mins until they are done to your liking. I baked them to varying shades of light brown to some with a little dark brown (okay, occasionally burnt tips, but I just ate those off). The lighter vs darker coloring changed the flavor of the squash sticks, so that added some variety to Ellie’s squash repertoire as well.
Steamed Squash Bites
Cut the raw squash sticks from above into about ½” pieces. Steam squash with a steamer if you have one. If not, you can boil the squash too, but the texture will be slightly different, and you lose a bit of the squash’s awesome nutrients boiling. Steam covered or boil until squash is easily pierced with a fork or knife. Voila! Steamed squash. If you have a little one, feel free to cut the squash up into smaller pieces before offering it.
Roasted pieces
Follow the same directions as the Roasted Squash sticks, but use the raw squash sticks cut into about ½” pieces, as in the steamed squash bites. Baking time is shorter as they are smaller pieces of squash.
Frozen squash bites
This iteration is NOT for babies. Use the raw bite-sized squash pieces as described above and follow directions for freezing as in ‘Frozen Squash Sticks’. Ellie really liked sucking on these until they were soft and then mashing them with her tongue (and then of course with her – spitting them out). She also liked playing with them in her high chair. One of her favorite ‘games’ was to float some of these in a bowl of water and she fished them out with a spoon and put them in her mouth or a separate bowl. Games people! Play with your food! Isn’t that what we were taught growing up?
But seriously, for kiddos with oral aversion or sensory issues, games are KEY for motivation to explore their relationship with food. I’ll do an entire post soon on some of the games and food play we do with Ellie.

Dehydrated bites
This iteration is also NOT for babies. Cut the sticks from above into ½” to 1” pieces, so they become bite sized. Optional: soak bites in heavily sea salted water for an hour and then dry on either paper towels or a flour sack towel. Place bites in a single layer on a ‘fruit leather tray’ and sprinkle with sea salt. Dehydrate at 135 degrees Fahrenheit until sticks no longer have any ‘dampness’ to them, about 8-10 hours. Cool and store.
You can also dehydrate bites in the oven. Use a silicone lined baking sheet and set oven temp to the lowest it will go. Bites are done when there is no longer any noticeable dampness.
Remember, these are not for babies as they are pretty tough. Ellie put them in her snack cup and sucked on them and mostly just spit them back out when they became mush. I figured at the very least it was flavor exposure for her as well as encouraging her to put food in her mouth.
Grated Squash, Flour, Crackers, and Chips
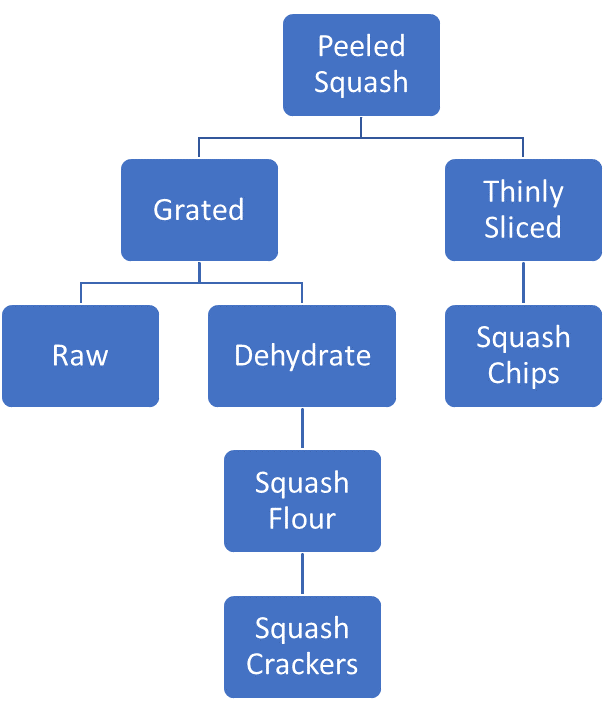
Raw – grated
If I was only doing a small amount of grated squash, I just peeled and cut off a section of squash and grated it with a box grater. If I was doing a large amount in preparation of dehydrating it or making flour, I used my food processor to accomplish the job much quicker. Grated is great (HAHA, sorry) for developing fine motor skills and adding the ‘messy’ element without it being another puree. If your child doesn’t have an oral aversion like Ellie, they will probably also be excited to eat food this way. It is a fun way to play as well as easy to eat since it is already in very small pieces and doesn’t require much chewing ability.
Dehydrated grated squash
I highly suggest using a good food processer to quickly accomplish the task of grating squash. Or you can just feel good about getting your arm workout in for the day after grating one or two of those suckers. I peeled and cleaned out the goop (but don’t toss the seeds, read about roasted seeds in this post, yum!!). Then chop the squash into large chunks that are small enough to fit in your food processer. Process until all the squash you are wanting to use is grated. To dehydrate you can either use the oven on a very low temp, 180 to 200°F, or a food dehydrator with a fruit leather tray insert.
If you choose the oven method, line a rimmed baking sheet with a silicone baking mat. Spread the grated squash in a thin layer over the mat. Sprinkle sea salt over the squash. Roast in your 180-to-200°F oven for approximately 7-10 hours, or until squash is completely dry and easily broken. Stir squash around once or twice during cooking time to help with even dehydration. When done, remove from oven and allow to cool completely before placing in an airtight storage container.
If you choose to use a food dehydrator, you will need the ‘fruit leather trays’. Place trays into the dehydrator and spread grated squash evenly over trays. Sprinkle on sea salt if you are using it. Dehydrate squash at 135°F for a LONG time. I think mine took almost a full 24 hours. If you are unsure, just keep dehydrating. It is done when it easily snaps or crunches. I ‘flipped’ my squash partway through to help with complete dehydration throughout. For the most part though, once you get the squash going it is a very hands-off process, yay!
Butternut squash flour
To make squash flour truly isn’t as intimidating as it seems. Follow the previous steps for dehydrated grated squash. Then place cooled, dehydrated squash in a good food processor and blend until squash resembles a powdery flour. Word to the wise, wait a minute or two after blending before removing the food processor’s lid. I had a lot of squash flour dust coating parts of my kitchen due to my lack of patience. Don’t be me. Once the dust has settled pour the flour into an airtight container.
Crackers
There is a debate in our household which squash preparation is our favorite to snack on with Ellie – to encourage her eating. We all really enjoy the squash seeds, but beyond that, my husband and I have different opinions. He really enjoys the roasted squash pieces with sea salt that have been roasted until they have a good amount of color. I on the other hand am all about these ‘crackers’!
Preheat your oven to 350 degrees Fahrenheit. Take around 3 T of squash flour, either some you made or some you have purchased. (I like this company, not sponsored just have used it for Ellie). Mix in a pinch of sea salt if using. Stir in a tsp of water at a time until you have reached a consistency of play-doh. Take a baking sheet with a silicone baking mat on it and press mixture into about a half dollar to quarter-sized circles and about ¼” thick. Sprinkle a little sea salt on tops. Bake for 7-10 mins until crackers are set. Depending on your child’s age either serve crackers broken up into pieces or whole. Go ahead and eat a couple yourself. After all, it’s good to model eating foods your child eats too, right?! They are tasty!
Note: This is a great one to allow Ellie to ‘help make her food’. She can scoop the ‘flour’, sprinkle salt, add a little water, and stir. With help of course – I am not trying to make a giant cracker on the floor. Her favorite part is forming the crackers. She ended up ‘sneaking’ a bit of the cracker dough from the baking sheet to eat and she thought she was funny. I was just happy she was eating it! Also, since play-doh and the like frequently have ingredients that Ellie must stay away from, I was happy to have her play with this as her ‘play-doh’.
Squash chips
Peel and half butternut squash top to bottom. Clean out the innards (save the seeds for butternut squash seeds). Cut the halves in halves again top to bottom, now your squash is quartered. Using either a knife or a mandolin, cut squash quarters in thin slices so they resemble tortilla chips. Soak squash slices in a large bowl of sea salt and water for 30 min to an hour. Lay out a flour sack towel and place the squash slices on the towel. Either fold over the other half of the towel or use another towel to lay on top of the slices and pat to dry.
Take the dried squash slices and either toss slices with sea salt in a large bowl, or you can sprinkle sea salt on the slices later. Lay the slices in a single layer on a ‘fruit leather tray’ insert for a food dehydrator or on a silicone baking mat lined baking sheet for your oven. If you didn’t salt the squash chips earlier, sprinkle sea salt over the chips now. Dehydrate in your dehydrator at 135°F for about 10-12 hours or until the chips are very dry and break when snapped. Cool and store in an airtight container.
I know very well that finding new ways to present a limited selection of foods to a child can be exhausting. If you found at least one new way to present food to your child through all of that, I am happy.
For those of you who want to see the crazy big chart for all 21 ways not broken down, here it is. Just don’t expect to be able to read it since it is super tiny, you can just take my word for it! If you would like to have a copy of this, please email me and I will send it to you!